
Updating Hours Information on the Dash: Difference between revisions
Automated edit: Updated image alt text for accessibility |
Automated edit: Updated image alt text for accessibility |
||
| (3 intermediate revisions by the same user not shown) | |||
| Line 11: | Line 11: | ||
* The '''Calendars''' tab will list each of the Google Calendars you’ve been authorized to edit. Click the '''View Calendar''' button for the calendar to which you are subscribing. ''Note: If you expect to have editing access to a calendar, but you don’t see one listed, please request access by [https://support.swarthmore.edu submitting a support ticket] or sending an email to [mailto:support@swarthmore.edu support@swarthmore.edu].''[[File:Updating Hours Information on the Dash 1778183258587.png|alt=Settings window on the Dash showing the Calendars tab with a list of calendars and red View Calendar buttons for each|center|thumb|459x459px]] | * The '''Calendars''' tab will list each of the Google Calendars you’ve been authorized to edit. Click the '''View Calendar''' button for the calendar to which you are subscribing. ''Note: If you expect to have editing access to a calendar, but you don’t see one listed, please request access by [https://support.swarthmore.edu submitting a support ticket] or sending an email to [mailto:support@swarthmore.edu support@swarthmore.edu].''[[File:Updating Hours Information on the Dash 1778183258587.png|alt=Settings window on the Dash showing the Calendars tab with a list of calendars and red View Calendar buttons for each|center|thumb|459x459px]] | ||
* A new modal window will open, which displays that calendar’s upcoming events. Click the '''''Subscribe to [NAME OF CALENDAR]''''' button.[[File:Updating Hours Information on the Dash 1778183310906.png|alt= | * A new modal window will open, which displays that calendar’s upcoming events. Click the '''''Subscribe to [NAME OF CALENDAR]''''' button.[[File:Updating Hours Information on the Dash 1778183310906.png|alt=Google Calendar interface for the Bookstore with options to subscribe to the Bookstore Google Calendar and create a new event, showing the week of August 24 to 30, 2025|center|thumb|800x800px]] | ||
* A new tab will open and take you to Google Calendar. You will be asked to confirm that you’d like to subscribe to the calendar. Once you’ve confirmed your calendar subscription, return to The Dash and follow the next section of documentation. | * A new tab will open and take you to Google Calendar. You will be asked to confirm that you’d like to subscribe to the calendar. Once you’ve confirmed your calendar subscription, return to The Dash and follow the next section of documentation. | ||
| Line 45: | Line 45: | ||
* Navigate to the specific event you’d like to edit. | * Navigate to the specific event you’d like to edit. | ||
* Click on the event to display its details. Then click the '''Edit [NAME OF EVENT]''' button.[[File:Updating Hours Information on the Dash 1778183432609.png|alt=editor | * Click on the event to display its details. Then click the '''Edit [NAME OF EVENT]''' button.[[File:Updating Hours Information on the Dash 1778183432609.png|alt=Google Calendar event editor showing OneCard Office open hours from 8:30 AM to 4:30 PM on August 27, 2025, with an option to edit the event|center|thumb|600x600px]] | ||
* This will take you to the Google Calendar event, where you can begin to modify the event. | * This will take you to the Google Calendar event, where you can begin to modify the event. | ||
* Set the event’s start and end times so that they reflect the department, office, location, or service’s hours of operation.[[File:Updating Hours Information on the Dash 1778183459442.png|alt= | * Set the event’s start and end times so that they reflect the department, office, location, or service’s hours of operation.[[File:Updating Hours Information on the Dash 1778183459442.png|alt=Google Calendar interface showing event start date and time set to Dec 6, 2021, 8:00 a.m., and end date and time set to Dec 7, 2021, 12:00 a.m., with a Time zone option|center|thumb]] | ||
* Save the event by clicking the blue '''Save''' button. | * Save the event by clicking the blue '''Save''' button. | ||
** This event | ** This event | ||
| Line 59: | Line 59: | ||
* Click on the blue '''Create New Event''' button. This will initiate the process of creating a new Google Calendar event in whichever calendar you are currently viewing. | * Click on the blue '''Create New Event''' button. This will initiate the process of creating a new Google Calendar event in whichever calendar you are currently viewing. | ||
* Set the event’s start and end times so that they reflect the department, office, location, or service’s hours of operation.[[File:Updating Hours Information on the Dash 1778183525432.png|alt=Google Calendar start and end times|center|thumb]] | * Set the event’s start and end times so that they reflect the department, office, location, or service’s hours of operation.[[File:Updating Hours Information on the Dash 1778183525432.png|alt=Google Calendar event time settings showing start and end times with a dropdown menu set to 'Does not repeat' for recurrence options|center|thumb]] | ||
* Optionally, create a recurring event series by clicking the dropdown that reads “Does not repeat” and setting a recurring schedule for the event. This will be useful for quickly setting up standard hours of operation. | * Optionally, create a recurring event series by clicking the dropdown that reads “Does not repeat” and setting a recurring schedule for the event. This will be useful for quickly setting up standard hours of operation. | ||
* The updated information should display on The Dash shortly after saving. | * The updated information should display on The Dash shortly after saving. | ||
Latest revision as of 01:34, 7 July 2026
Getting Started
Prior to updating hours information, editors will need to perform the one-time task of subscribing to the individual Google Calendars associated with the hours they intend to manage. If an editor is responsible for managing the hours for multiple departments, offices, locations, or services, they’ll need to ensure that they’ve subscribed to each individual calendar.
Subscribing to Calendars (One-time Prerequisite for Editors)
- First, ensure that you are not logged into any Google Accounts aside from your Swarthmore College account.
- Scroll to the bottom of the navigation sidebar and click the Login button. Note: Mobile users will need to first tap the “hamburger” icon, the three horizontal lines stacked on top of one another that are found in the top-left corner, to reveal the navigation.
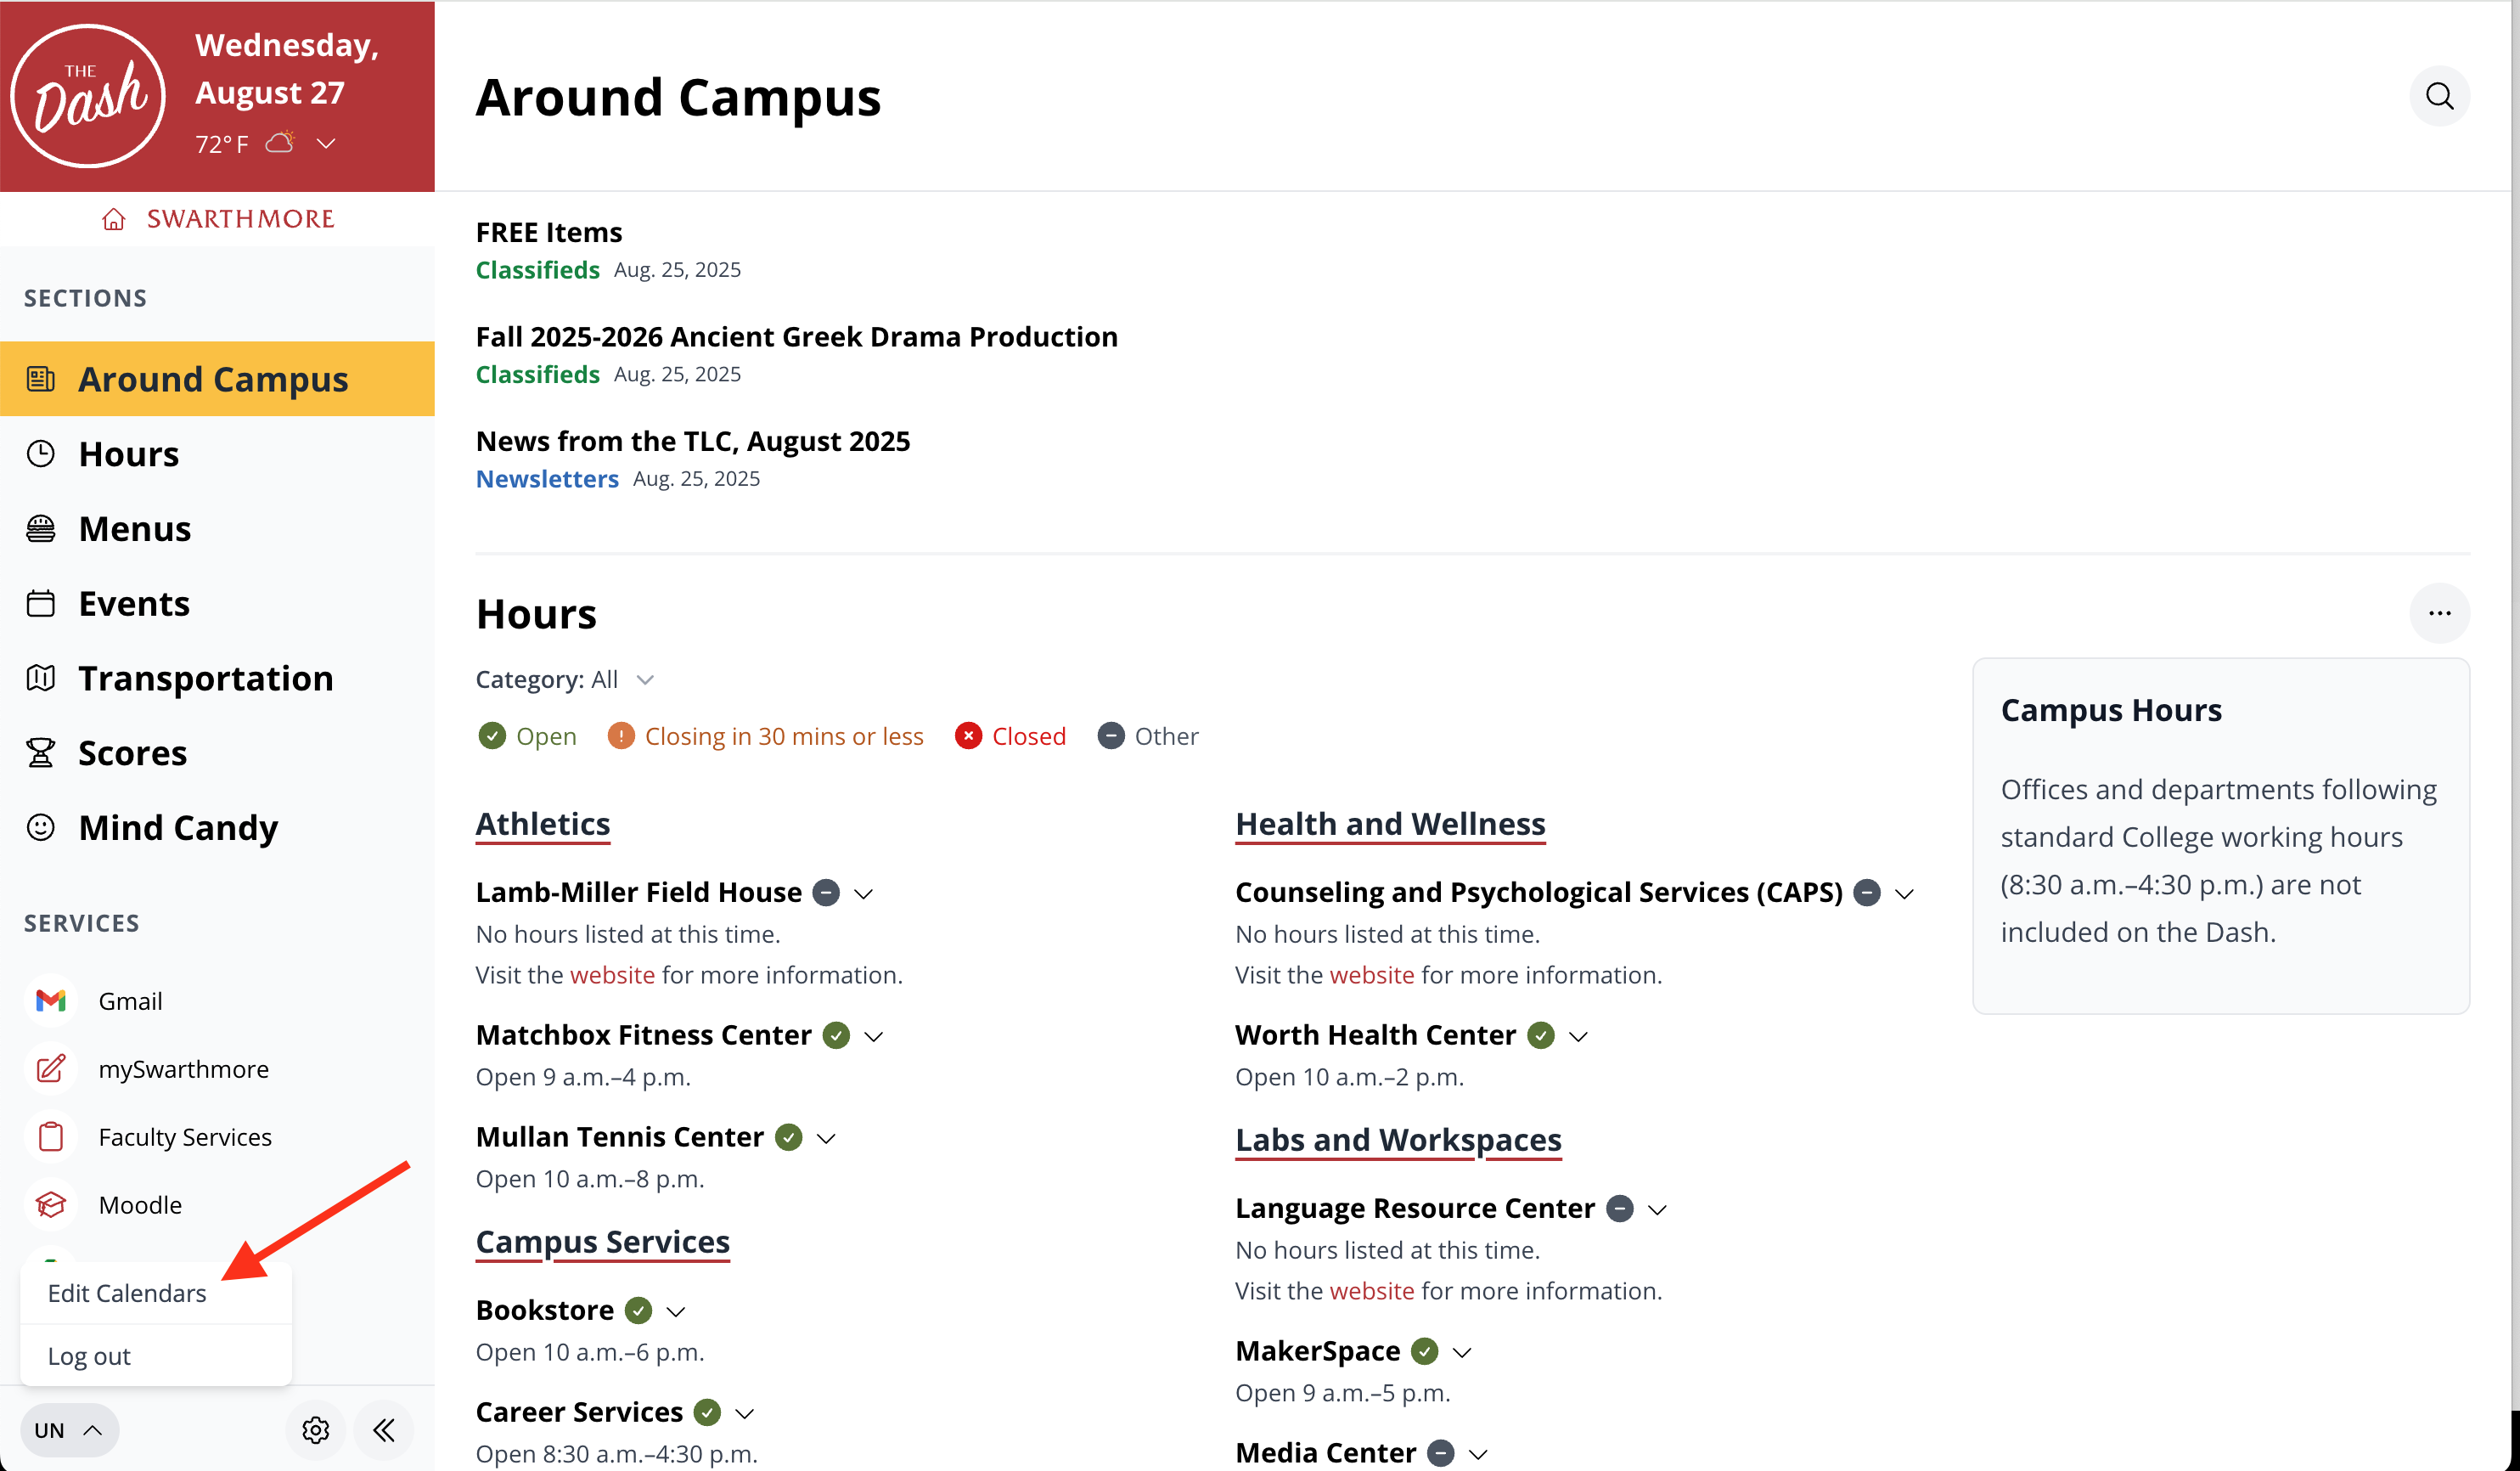
- After successfully authenticating, the Login button will be replaced with your initials. Click your initials and then Edit Calendars to reveal all of the calendars for which you have edit access.

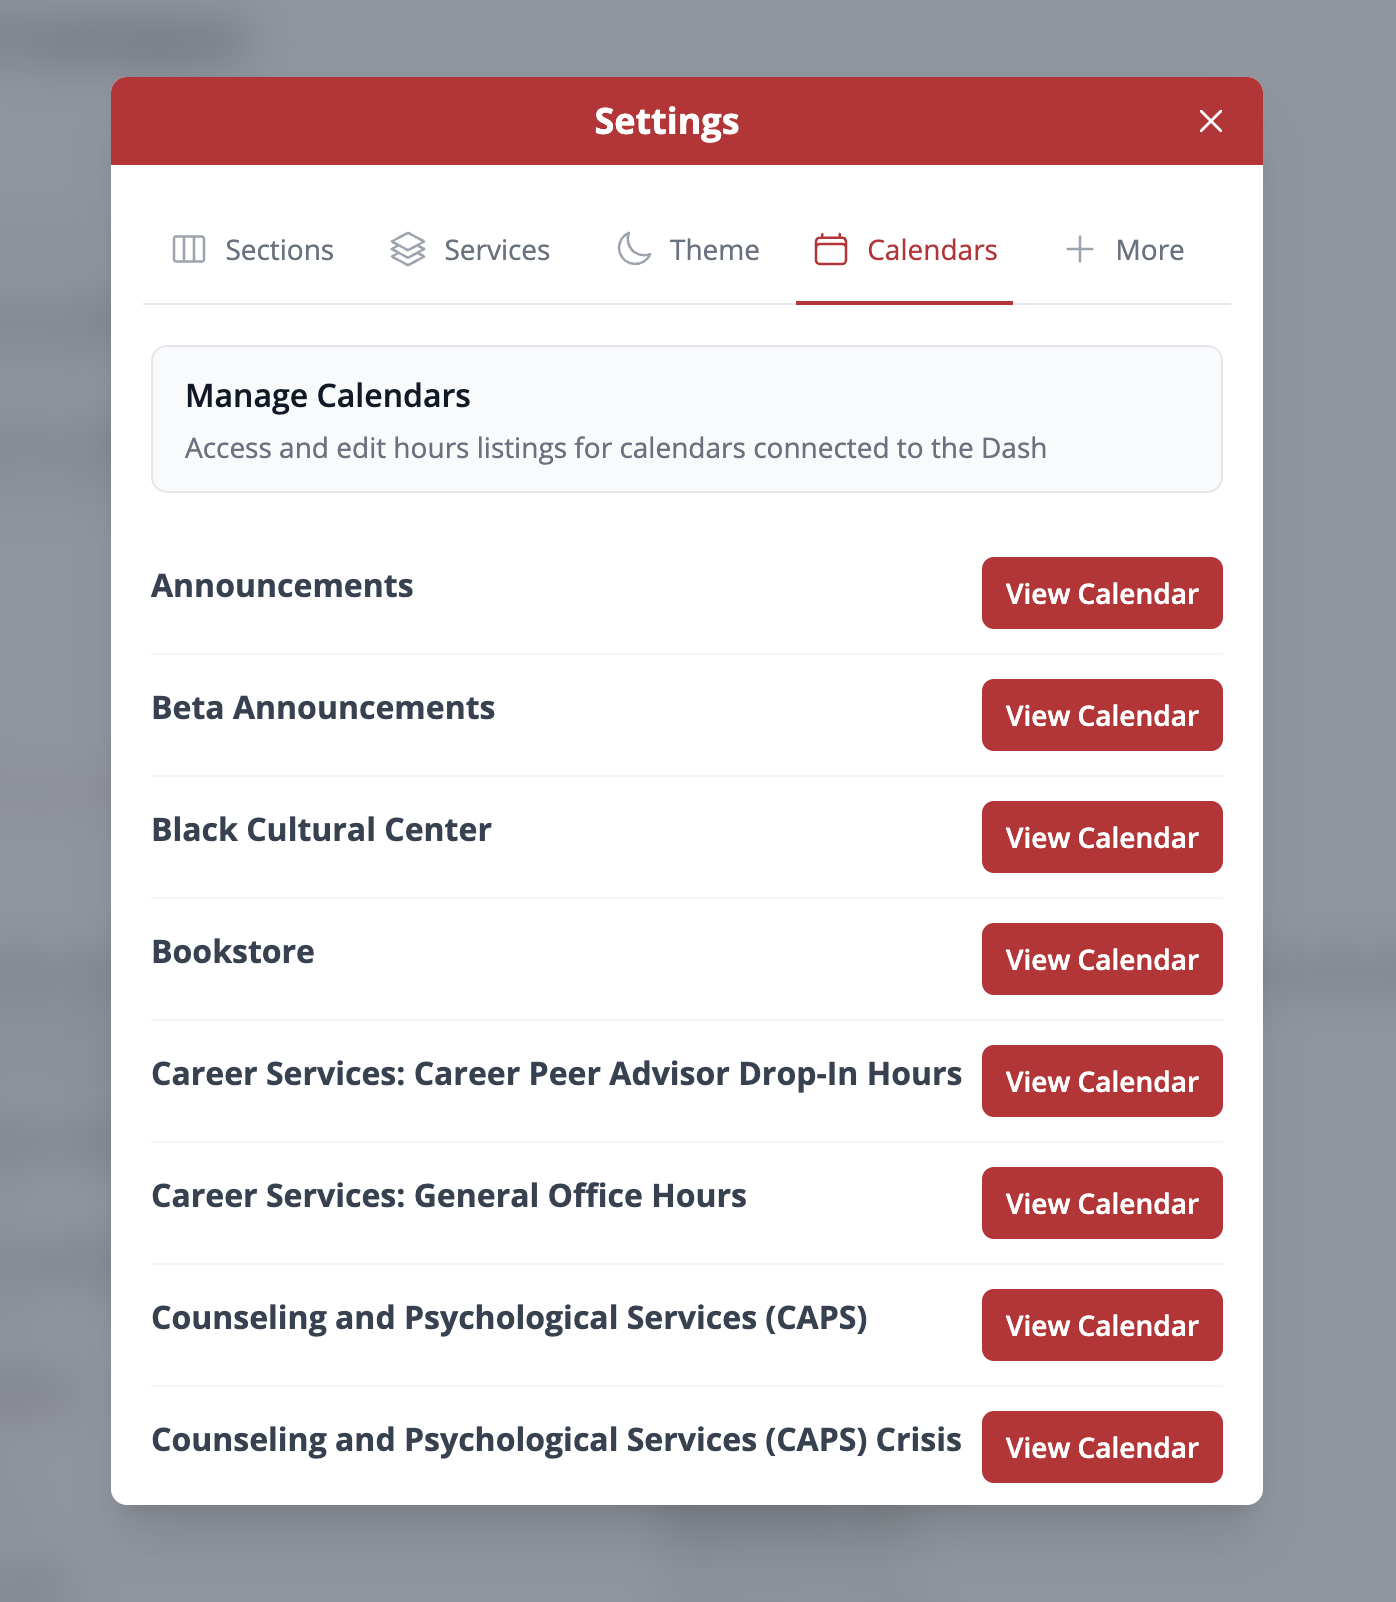
- The Calendars tab will list each of the Google Calendars you’ve been authorized to edit. Click the View Calendar button for the calendar to which you are subscribing. Note: If you expect to have editing access to a calendar, but you don’t see one listed, please request access by submitting a support ticket or sending an email to support@swarthmore.edu.

- A new modal window will open, which displays that calendar’s upcoming events. Click the Subscribe to [NAME OF CALENDAR] button.


- A new tab will open and take you to Google Calendar. You will be asked to confirm that you’d like to subscribe to the calendar. Once you’ve confirmed your calendar subscription, return to The Dash and follow the next section of documentation.
Managing Hours Through The Dash
There are several methods available for managing hours information through The Dash. Each of the options outlined below will require that you first log in:
- Scroll to the bottom of the navigation sidebar and click the Login button. Note: Mobile users will need to first tap the “hamburger” icon, the three horizontal lines stacked on top of one another that are found in the top-left corner, to reveal the navigation.
- After successfully authenticating, the Login button will be replaced with your initials.
Additionally, you’ll need to be logged into your Swarthmore Google Workspace account. The easiest way to ensure that you're logged in is to authenticate to your Swarthmore Gmail account.
Opening the Calendar View Modal Window
Option 1: Using the Settings Modal
- Click your initials and then Edit Calendars to reveal a pop-up modal listing all of the calendars for which you have edit access.
- Find the calendar that you’d like to edit and click the View Calendar button. This will open a new modal window, which displays that calendar’s upcoming events.
Option 2: Using the Hours Section
Note: If your location, department, office, location, or service does not have a calendar entry for the next 7 days, it will not be displayed in the hours section and this method will be unavailable.
- Scroll to the Hours section of The Dash.
- Find the hours information associated with the department, office, location, or service that you’ll be managing.
- Click the title of the hours information to reveal additional options.
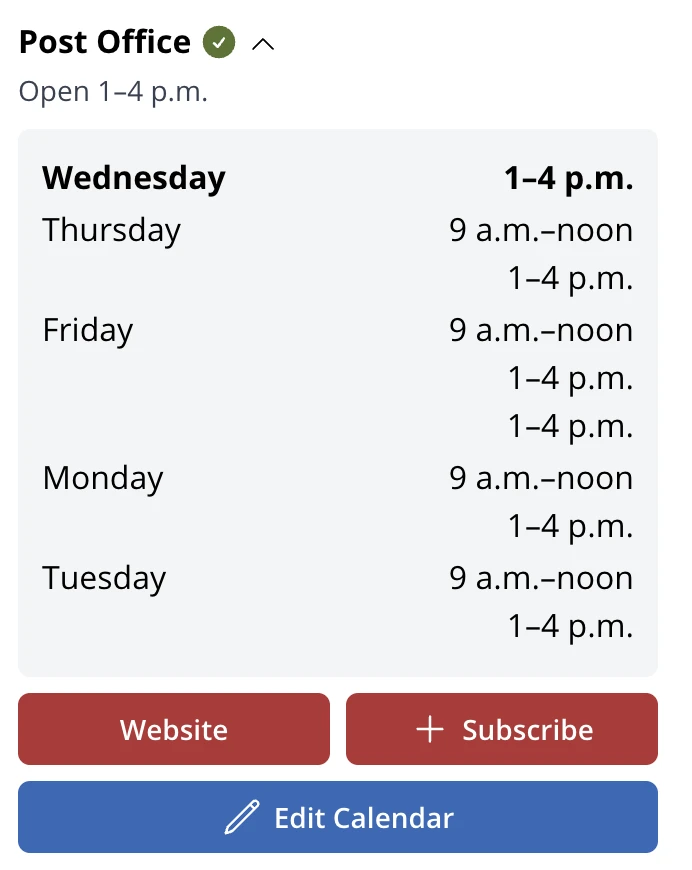
- Select the Edit Calendar button. This will open a modal window, which displays that calendar’s upcoming events.

Editing and Creating Hours Events
With the calendar view modal window open, you can now begin to manage your events.
Editing an Existing Event or Event Series
- Navigate to the specific event you’d like to edit.
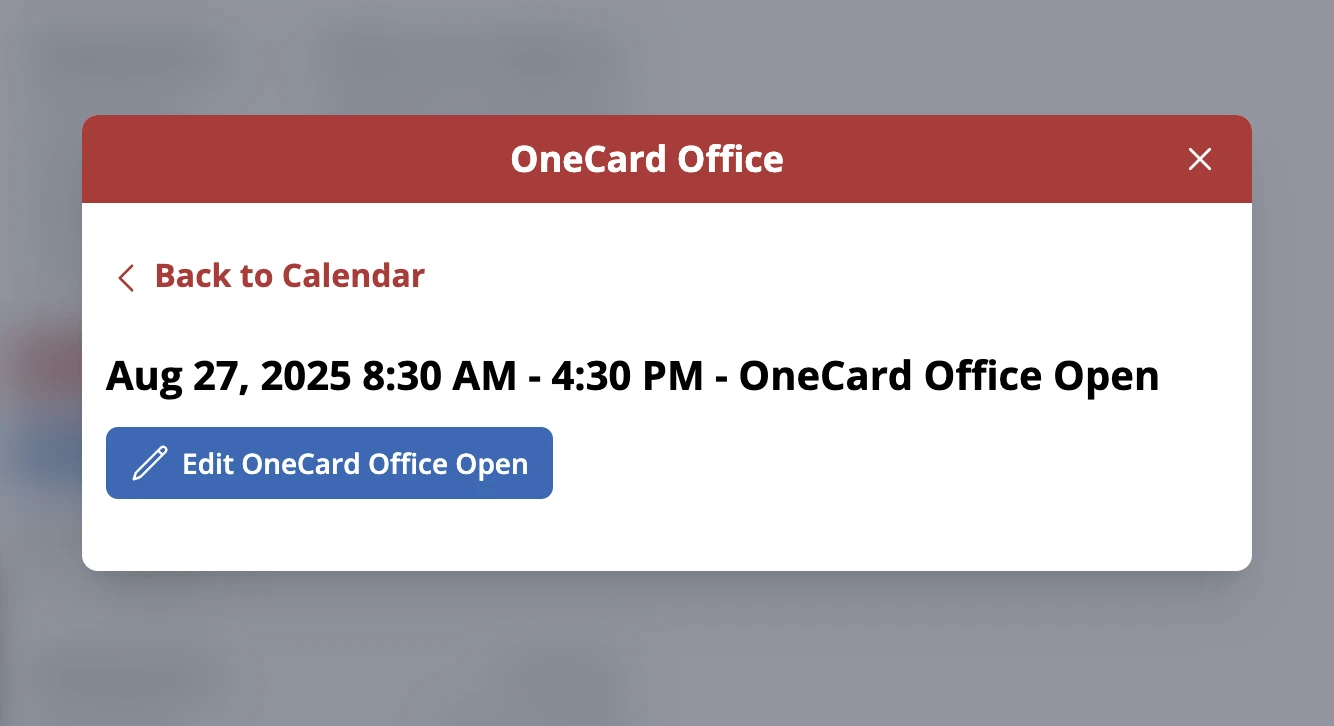
- Click on the event to display its details. Then click the Edit [NAME OF EVENT] button.
- This will take you to the Google Calendar event, where you can begin to modify the event.
- Set the event’s start and end times so that they reflect the department, office, location, or service’s hours of operation.

- Save the event by clicking the blue Save button.
- This event
- This and following events
- All events
- If the event is part of a series it will ask you if you wish to edit:
- Make the appropriate choice for your edit.
- The updated information should display on The Dash shortly after saving.


Creating a New Event or Event Series
- Click on the blue Create New Event button. This will initiate the process of creating a new Google Calendar event in whichever calendar you are currently viewing.
- Set the event’s start and end times so that they reflect the department, office, location, or service’s hours of operation.

- Optionally, create a recurring event series by clicking the dropdown that reads “Does not repeat” and setting a recurring schedule for the event. This will be useful for quickly setting up standard hours of operation.
- The updated information should display on The Dash shortly after saving.

Directly Managing events through Google Calendars
| Anything accidentally added to these calendars WILL display on The Dash. For this reason we recommend sticking to The Dash interface for all but those who consider themselves extremely familiar with Google Calendar. Additionally, we’d like to remind folks that it’s a best practice to log out prior to leaving your computer unattended. |
Because the Dash makes use of Swarthmore College’s Google Workspace, the calendars that you have edit access to will appear in your Google Calendar’s My Calendars section. This means that you can manage upcoming events directly through Google Calendar on any device that has access to the application.